This is the quilt block we are making:
In the last lesson we discussed how to make a Boston Block and the HSTs.
If you have those block units ready to go then we can start putting them together.
I like to divide the quilt block into 4 patch sections to sew together.
The bottom row are the 4 corners and the top row are the centers of each side. the pinwheel is the center of the design.
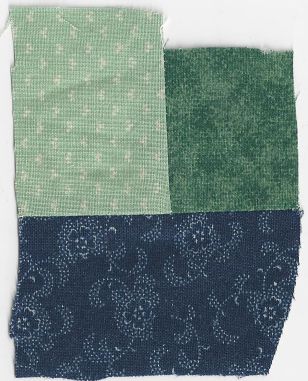
I lay them out and then lay the left square on top of the right square. then tack the left edge where the seam will go through
Here you can see all of them tacked on the seam ready to sew together
When you tack them you tack the left edge and then I turn them so they are set right to go under the needle.
Sew the seams and then iron the seam open on all of them.
Now place the sewn pairs of squares together into the 4 patches as shown above
Tack them in place and sew them together.
Once you have the 4 patches made make sure you iron them well and I like to iron the seams open. I prefer to have it as flat as possible.
So here are the 4 patches sewn
Sew the top left 4patch to the middle top 4patch
And the center left 4patch to the center 4 patch
Sew the top right 4 patch to the center right 4 patch
Again lay the left square over the right square and tack in place
Sew the seams and iron them open
Sew the bottom joined 4 patches onto the top two joined 4 patches
Sew the bottom right 4 patch to the top joined 4 patches on that right side.
Sew the right side to the left side
Use a ruler to check the size and square up the quilt block if needed
and the finished Quilt Block.
If you used a 1 1/2" template you should have an approx. 6 1/2" quilt block
Depending on your seam allowance your quilt block may vary a bit.
Okay we have a 6 1/2" quilt block now.
I usually aim for an 8 1/2" unfinished quilt block top for my hotpads. You can of course use any size you like.
To get to the size I like I use borders.
These borders can be anything you can come up with. To reach an 8 1/2" size I add borders to the sides and then trim down to the size I want.
I don't measure my strips other than to make sure they are a bit longer than my sides and a bit wider than I expect to use. For this size I will need at least 1 1/2" width on each side.
I add the short sides first and then trim the ends and sew on the long sides. Then I trim the whole thing to 8 1/2".
Here are some other ideas you might want to consider. These might make for a larger hotpad.
To get this one I sew two strips together and then trim down the red strip in the center. then add the other dark strip to the red center strip. I trim it to the size I want it and then add that to the quilt block. Repeat for the other side and then add the red squares to the other prepared strips. Then sew the strips with squares onto the quilt block. If this is confusing just ask and I will be happy to show this in more detail.
Another way to add a border is with a piano border or I call it a strip border
These strips are some I had ready so they dont' go color wise but you get the idea
Here you can see I added borders that overlap.
And here I turned the quilt block on point and added corner triangles
These borders aren't sewn on as I was just showing you possibilities.
Tips and Troubleshooting:
Make sure your squares are matching at the corners. Take the time to check for this as you join the Bostons and HSTs. This is one of the main reasons things become crooked and seams don't meet or points are lost
To keep fabric and seams from moving I prefer to tack things in place
I think pins can still allow too much movement.
I take the needle through the fabric just below the seam join and then up and out above the seams. Take this stitch at least once or twice. Make sure the thread is tight and not loose.
I tack at the edge on each end where the seam will go through. I also tack anywhere there are seams to match
When I tack I often like to check to see if my seams are meeting after I tack them but before I sew the seam.
You can see the seams meet just in front of my thumb there. It is good to make sure you got the tack on there in the right place and that it is holding well. This is one benefit of using tacks that you can't do with pins.
After sewing squares or 4 patches make sure to measure to make sure it is the right size. This will help to make sure you end up with the size of quilt block you want. Now is the time to fix things that might not be quite right.
Here I checked a joined pair of squares and they were crooked. I like to turn them over so I can see them from the back. I think it is easier to see if they are crooked.
Crooked
Measured you can see it isn't straight
And fixed
To fix this I tightened the seam. to do this you just decide where it needs to be fixed and sew along the seam and make the seam a bit wider.
Here you can see where I had to fix some 4 patches
I pinched the side I thought would bring it back to square
to decide where to straighten the seam
And here I straightened it
When you do this you do need to make sure you don't sew over the fabric in the seam as you can catch it and bunch up the seam instead of fixing the problem.
And here it is fixed
I like to iron my seams open so I thought you might like to see the back of my quilt block
Thanks for following along!! Rhonda