
Over time I have developed several shortcut methods that make piecing easy and quick. I call it my cut down method.
Basically you sew fabric pieces together and then cut a square out of the center. As a miniaturist this allows me to use small pieces without actually handling small tiny pieces. The piecing just sort of happens when you cut out the pieced square.
Once you learn how to make that particular “Block” unit then you make as many as you need in the colors you need to make the quilt block you choose.
Once you have made all the quilt blocks then those become a quilt or other project you choose to make.
The size of the “Block” unit is whatever you want it to be. I am a miniaturist and I mostly use small sizes. But the method is about the piecing not about keeping it small. You can use any size template you want depending on how big you want the quilt block to be.
For this Hotpad project we are going to use the 6 x 6 grid design. This means there are 6 rows of 6 Boston Blocks per row. I like the pieced quilt block to be 6 1/2" so I can add borders to get an 8" finished Hotpad. This size uses the 1 1/2" template. If you want yours to be larger you can use a larger template. I have made them bigger and used them for a trivet under dishes and my daughter has used them as placemats.
Here is the quilt block and the layout of the "blocks"


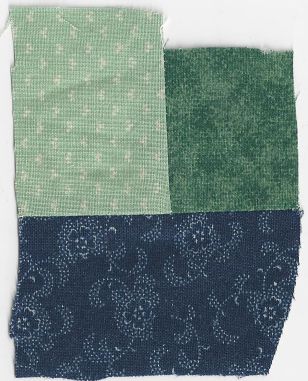
So now we break it down and see the different "Blocks" and the colors I used.
Boston Blocks
you will need to make:
4 Blocks 4 Blocks 4 Blocks 4 Blocks 4 Blocks


Half Square Triangle Blocks
4 Blocks 8 Blocks 4 Blocks


Okay now on to how to make the Boston Blocks
When I developed this method I wanted something that didn't have alot of math involved. I wanted it quick and easy to make.
so I used swatches of fabric. I call it rough cut when you just cut off a piece of fabric. You can use scraps also.
You need a light a medium and a dark for this first one. After that follow the colors you need to make the other Bostons.
Here you see two different sets of swatches. One set the medium is on the rt side and the other set the med is on the left side. This makes them mirror images. You will need to watch for this when making your blocks.

Here I've sewn the top two swatches together
I trimmed the bottom of the joined swatches to a straight edge

Next sew on the third swatch to the joined swatches
Place the template on the seams so the corners match the seams
Don't let it move while you cut it out

And here you have a Boston Block cut out

------------------------------------------------------------------------------------------------------
Now here are a couple of other ways to make the Bostons
You can use strips to join the top two fabrics. Cut them at least a bit more than half the width of the template on point.
You can cut the joined strips the size you need. For the 1 1/2" Bostons the strips need to be cut at least 1 3/4" sections. Then use the sections and sew on the third fabric to the edge. Make sure you place the medium on the side it needs to be for the color placement you need. As in the mirror image blocks.

Another alternative for those who want to take the time to save a bit of fabric you can cut squares and then cut them into triangles. For the 1 1/2" size you need to cut at least 2 1/4" squares. For the third or bottom fabric cut the squares from corner to corner for two triangles. And for the quarter triangles cut the same size square but cut them into 4 triangles from corner to corner.

This will allow you to have less leftovers.
Speaking of leftovers. - I never worry about leftovers. I reuse the scraps into other "Blocks" or make more Boston Blocks. You can also use them to make crumb blocks or crazy quilt blocks.
One thing I hear alot is what about Bias. I don't pay any attention to the Bias edge. Yes you will have sides that are cut on the bias. But if you tack then you dont' have to worry about Bias edges.
I tack where seams meet and I tack on the edge of joining two blocks. This keeps the fabric from moving so no stretching. I think tacks work better than pins. Pins can still move but tacks stay put.
A tack is a stitch or two in place. Put the tack where the seam is going to go through. then you don't have to take it back out.

-------------------------------------------------------------------------------------------------
Now I know there are alot of ways to make HSTs. But I think my way is quick and easy with little waste.
I use strips.
It doesn't matter if your seam allowance is perfect. I didnt' use a trimmed edge but you can. As long as you pay attention to sewing a straight seam you don't have to pay attention to seam allowance.

Sew two strips together
Open and iron the seam open. (or to the dark if you prefer)

place your strips on a cutting mat. I like to fold up the length so I am only working with part of the strips at a time. It's easier to turn the mat if the strips are folded up some.

And here are your HSTs

When you get the HSTs cut out you can pull apart the strips and sew them together on the other side and continue cutting out HSTs.
Next week we will look at how to put the quilt block together and then finish the hotpad.