Tuesday, August 26, 2014

Rhonda's 2nd Boston Block Hotpad - Part 3

OOPS!  This lesson should have been posted before the previous lesson. Sorry about that!  Rhonda


Welcome to my second Boston Block Hotpad Class

In this lesson we are going to discuss fabrics and colors. This is only in regard to my designs. For other projects you may want to blend your colors and do other treatments.

This is the quilt block we are going to make

Name:  Quilt Block final 300.jpg
Views: 1800
Size:  25.8 KB

Of course 100% cotton is the best choice as far as the type of fabric to use.
Whether you use batiks or civil war fabrics or country prints is all up to you and what you like.

However to make a design stand out and be noticed you need to pick your type of prints or batiks etc carefully.

When I design I use alot of contrast in my colors. This makes certain areas of the design stand out. So choosing the right color combinations will affect how your finished product looks. 
I know alot of people are not comfortable with choosing colors. So I'm going to give you some basics to use as a guideline. 

Colors break down into different values:
as you can see this starts light and gets a big darker as it goes til you reach the dark values.

Light 
Name:  g1 155.jpg
Views: 1748
Size:  2.7 KB

Light with a print
Name:  g2 155.jpg
Views: 1748
Size:  12.0 KB

Light Medium
Name:  g2a 155.jpg
Views: 1749
Size:  6.2 KB

Medium
Name:  g3 155.jpg
Views: 1745
Size:  5.9 KB

Light Dark
Name:  g4 155.jpg
Views: 1745
Size:  5.6 KB

Dark
Name:  g5 155.jpg
Views: 1741
Size:  6.6 KB

Look at the design you want to make and see how many different colors you will need. In this quilt block I have designed you will see 5 different colors.

You will need to choose:

a light background - light enough so the colors show up against it.
a medium red - Make sure it isn't too light
a light red/pink - It needs to show against the background color 
a medium green -This should be not quite dark but not too light either
a light green - light enough to show against your medium but not blend with the background

You don't want to let your colors blend. To get the right look you need to choose fabrics that you can see seperately when they are laid side by side. If you have 2 shades of yellow and you lay them together you should have strong different values.

You can also achieve a contrast by using fabrics that are different as in say one is a large check pattern and the other one is a leaf pattern.

Here are some examples of what not to do:

This one is too light and blends too much together
Name:  200.jpg
Views: 1744
Size:  9.2 KB

This one has been split into too many different colors
It's too busy looking. If you want to make it a scrappy
then make it all a scrappy look keeping the values in mind
Name:  200 2.jpg
Views: 1747
Size:  13.7 KB

This one could be okay but for me it is too much the same values
It doesn't stand out as well as it could if you used different values.
Name:  200 3.jpg
Views: 1747
Size:  7.8 KB

-----------------------------------------------------------------------------------------------

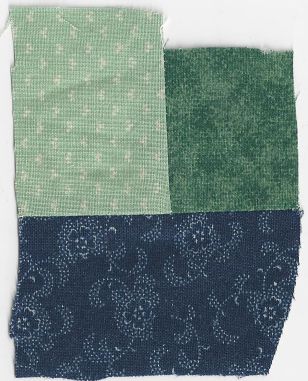
Okay now here are some good color combinations. They all use strong contrast so the design will stand out.
You can easily see each individual color apart from the others. 

Whatever color combinations you like make sure they all stand apart.
Of course we all know about the color wheel and if you look up one online you can see what the opposite colors are. Red is opposite of Blue etc. Keep this in mind when you choose your colors.


Name:  Brown and Teal.jpg
Views: 1752
Size:  34.1 KB Name:  Orange.jpg
Views: 1732
Size:  29.3 KBName:  Plaids.jpg
Views: 1727
Size:  27.3 KB Name:  300.jpg
Views: 1731
Size:  18.1 KBName:  Purple.jpg
Views: 1734
Size:  31.8 KB

Fabric amts you will need:

Red a strip 3" x 8"
Pink a strip 3" x 6"
Light Green a strip 3" x 33"
Med Green a strip 3" x 21"
Dark a strip 3" x 24"

2 short borders - 2" x 7"
2 long borders - 2" x 9"

Backing will need to be about 9" square
I use poly batting - traditional which is really dense
and I cut two layers.

If you prefer to use insulbrite feel free to use whatever you are comfortable using.

You will also need a loop. I use a new shoelace and cut a length about 2 1/2" long.

I don't use binding so that won't be a part of this project.


Wednesday, August 20, 2014

Quilt Retreat June 11-14 2015

Still looking to add some more quilters to our retreat next June! If you are interested let me know at patchesbyr@yahoo.com.

Missouri Star Quilt Co is a fascinating place to visit. If you are wanting to come don't miss out!
It's in Hamilton Missouri. Quilt shops to visit great restaurants and lots of quilting inspiration!

I'll be teaching two classes - showing my shortcut methods and maybe the Dresden Kaleidoscope also.

Come join us and have a blast!  Rhonda

Monday, August 18, 2014

Rhonda's 2nd Boston Block Hotpad Class --- Part 2

Last week we discussed colors and fabrics. This week we are going to make the Boston Blocks and HSTs(half square triangle) blocks.

Over time I have developed several shortcut methods that make piecing easy and quick. I call it my cut down method.

Basically you sew fabric pieces together and then cut a square out of the center. As a miniaturist this allows me to use small pieces without actually handling small tiny pieces. The piecing just sort of happens when you cut out the pieced square.

Once you learn how to make that particular “Block” unit then you make as many as you need in the colors you need to make the quilt block you choose. 
Once you have made all the quilt blocks then those become a quilt or other project you choose to make. 

The size of the “Block” unit is whatever you want it to be. I am a miniaturist and I mostly use small sizes. But the method is about the piecing not about keeping it small. You can use any size template you want depending on how big you want the quilt block to be. 

For this Hotpad project we are going to use the 6 x 6 grid design. This means there are 6 rows of 6 Boston Blocks per row. I like the pieced quilt block to be 6 1/2" so I can add borders to get an 8" finished Hotpad. This size uses the 1 1/2" template. If you want yours to be larger you can use a larger template. I have made them bigger and used them for a trivet under dishes and my daughter has used them as placemats. 

Here is the quilt block and the layout of the "blocks"

Name:  Quilt Block final 300.jpg
Views: 1695
Size:  25.8 KB        Name:  QB layout.jpg
Views: 1682
Size:  24.6 KB


So now we break it down and see the different "Blocks" and the colors I used. 

Boston Blocks
you will need to make:

4 Blocks        4 Blocks       4 Blocks      4 Blocks     4 Blocks 
Name:  1.jpg
Views: 1689
Size:  18.7 KB     Name:  c.jpg
Views: 1690
Size:  2.2 KB     Name:  d.jpg
Views: 1697
Size:  20.1 KB    Name:  b.jpg
Views: 1681
Size:  2.0 KB    Name:  a.jpg
Views: 1675
Size:  19.7 KB

Half Square Triangle Blocks

4 Blocks        8 Blocks      4 Blocks
Name:  f.jpg
Views: 1671
Size:  18.5 KB     Name:  e.jpg
Views: 1675
Size:  18.7 KB     Name:  g.jpg
Views: 1676
Size:  18.7 KB


Okay now on to how to make the Boston Blocks

When I developed this method I wanted something that didn't have alot of math involved. I wanted it quick and easy to make.

so I used swatches of fabric. I call it rough cut when you just cut off a piece of fabric. You can use scraps also. 

You need a light a medium and a dark for this first one. After that follow the colors you need to make the other Bostons.

Here you see two different sets of swatches. One set the medium is on the rt side and the other set the med is on the left side. This makes them mirror images. You will need to watch for this when making your blocks.

Name:  1.jpg
Views: 1658
Size:  17.8 KB

Here I've sewn the top two swatches together
I trimmed the bottom of the joined swatches to a straight edgeName:  2.jpg
Views: 1654
Size:  34.8 KB

Next sew on the third swatch to the joined swatches

 Name:  3.jpg
Views: 1657
Size:  30.7 KB 


Place the template on the seams so the corners match the seams
Don't let it move while you cut it out
Name:  4.jpg
Views: 1662
Size:  21.6 KB

And here you have a Boston Block cut out
Name:  5.jpg
Views: 1654
Size:  21.9 KB

------------------------------------------------------------------------------------------------------
Now here are a couple of other ways to make the Bostons

You can use strips to join the top two fabrics. Cut them at least a bit more than half the width of the template on point.
You can cut the joined strips the size you need. For the 1 1/2" Bostons the strips need to be cut at least 1 3/4" sections. Then use the sections and sew on the third fabric to the edge. Make sure you place the medium on the side it needs to be for the color placement you need. As in the mirror image blocks.Name:  6.jpg
Views: 1640
Size:  11.8 KB

Another alternative for those who want to take the time to save a bit of fabric you can cut squares and then cut them into triangles. For the 1 1/2" size you need to cut at least 2 1/4" squares. For the third or bottom fabric cut the squares from corner to corner for two triangles. And for the quarter triangles cut the same size square but cut them into 4 triangles from corner to corner.

Name:  7.jpg
Views: 1645
Size:  15.4 KB

This will allow you to have less leftovers.

Speaking of leftovers. - I never worry about leftovers. I reuse the scraps into other "Blocks" or make more Boston Blocks. You can also use them to make crumb blocks or crazy quilt blocks.

One thing I hear alot is what about Bias. I don't pay any attention to the Bias edge. Yes you will have sides that are cut on the bias. But if you tack then you dont' have to worry about Bias edges.

I tack where seams meet and I tack on the edge of joining two blocks. This keeps the fabric from moving so no stretching. I think tacks work better than pins. Pins can still move but tacks stay put. 

A tack is a stitch or two in place. Put the tack where the seam is going to go through. then you don't have to take it back out.Name:  Tacking 75.jpg
Views: 1654
Size:  40.6 KB

-------------------------------------------------------------------------------------------------

Now I know there are alot of ways to make HSTs. But I think my way is quick and easy with little waste.

I use strips.

It doesn't matter if your seam allowance is perfect. I didnt' use a trimmed edge but you can. As long as you pay attention to sewing a straight seam you don't have to pay attention to seam allowance.

Name:  8.jpg
Views: 1641
Size:  13.7 KB

Sew two strips together
Open and iron the seam open. (or to the dark if you prefer)Name:  9.jpg
Views: 1649
Size:  11.3 KB

place your strips on a cutting mat. I like to fold up the length so I am only working with part of the strips at a time. It's easier to turn the mat if the strips are folded up some.

Name:  10.jpg
Views: 1644
Size:  14.1 KB

And here are your HSTs
Name:  11.jpg
Views: 1642
Size:  16.1 KB

When you get the HSTs cut out you can pull apart the strips and sew them together on the other side and continue cutting out HSTs.


Next week we will look at how to put the quilt block together and then finish the hotpad.

Tuesday, August 12, 2014

Rhonda's 2nd Boston Block Hotpad Class - Part 1

Okay here is the First Lesson for this class!


 Boston Block Hotpad Class - Lesson 1

I am going to begin by listing the things you will need.

The most important thing you need will be a template.
I have the templates available and will send them for free.
You will need to send me a postal address so I can mail them out to you. They are hard acrylic so they are not sent through email.
 my email - patchesbyr@yahoo.com  

You will have a chance to work with a 1 1/2" template or a 2 1/2" template and you can have both if you like. Please make sure you specify which one or ones you want.

You will need a small cutting mat preferably about 6" sq or so. 
Any old cutting mats can be cut up and used for this if you have a used mat.

You will need the usual supplies:

rotary cutter
scissors
thread
pins 
a smaller ruler would be good if you have one. I use a 2 1/2" x 9" but you can use whatever you have.
If you use a template you have make sure you put nonslide dots under it. I use a thin strip of sandpaper cut to fit on mine.

In the next lesson I will discuss what fabrics and colors go together and how to get the best out of the design. 

1. choose fabrics and colors wisely 
2. how to make a Boston Block
3. how to use the boston block to make a quilt block
4. how to use the quilt block to make hotpads my way. 

Of course there are many ways to do anything and I understand my methods aren't for everyone. But if I can help anyone to find an easier way to do something then I am happy to oblige!

This is a Boston Block pieced square unit:

                 Name:  Boston Block - light.BMP
Views: 3130
Size:  46.8 KB


Two quilt blocks I will be using to build our hotpads.

Please remember my methods are easy to do and are a bit of an illusion. 
Designs look harder to make than they really are. It is all in the tricks of the trade! 

But I assure you beginners can make both of these quilt blocks!! If you can use a rotary cutter and mat you will be able to do this. 
Quilt blocks I will be using to build our hotpads.


 I would like to show you how to make a quilt block
    with 6 rows of 6 Boston Blocks in it -

This is what it will look like:

Quilt Block designed by me - Ashley -  6 rows of 6 pieced blocks(units).
Some are HSTs(half square triangles) and some are Boston Blocks
So I will be showing you how to make these 2 Blocks my way.
This quilt block uses the 1 1/2" template

Name:  Ashley -July 8.jpg
Views: 3130
Size:  41.8 KB

And then we will also make this quilt block-
It has 4 rows of 4 pieced blocks(units).
This quilt block uses the 2 1/2" template

     Name:  block---.jpg
Views: 3128
Size:  33.0 KB

Feel free to ask any questions you'd like! There are never any dumb stupid questions only questions you don't know the answers to yet. If you don't ask you can't learn.
I'm always happy to help if I can.

I'll be posting the next lesson next Tuesday Aug 19th 2014

                                                            Name:  Rhonda  Name 333.jpg
Views: 3181
Size:  2.7 KB